10.20.2009

BALMAINIA

Balmain is one of my fav designers right now, but their badass blazers are just slightly out of my budget range (or more like thousands of dollars out of my budget range.) I wanted to rock a blazer that mimicked the awesome shoulder silhouette of Balmain's blazers (here) so I finally put my love for shoulder pads to good use. 

Here's what you'll need:
- blazer (I got a men's blazer at a vintage store for $15.00)
- shoulder pads (I used two sets from JoAnn Fabrics, $3.99 each)
- thread (any color will do, you won't see it)
- knitting needles ($1.29)

TOTAL COST: $33.00 (price depends on what sort of blazer you start with...but any way you play it, this version is much more affordable than Balmain's beautiful jackets ranging from about 4K-13K)

As you can see from the photo below, the blazer was pretty slouchy before (it is a men's blazer, mind you.) The reason I couldn't resist it is because of the leather lapel and sweet buttons.


I started by sewing a pair of shoulder pads in half (so the round end touches the flat end.) Then I stitched together a normal shoulder pad with a half shoulder pad, so that both are stacked facing the same direction.


Next, stitch the knitting needles along the top seam of the shoulder pads. Place the knitting needle/shoulder pad combo so that the top seam of the shoulder pads (where the knitting needle runs) lines up with the shoulder seam of the inside liner of the blazer. Stitch the shoulder pads into place, but be sure to only stitch into the liner (not the outside layer of the blazer, otherwise you may see stitches from the outside.)

When I finished installing my double-whammy sets of shoulder pads, they were so big that I sort of looked like a linebacker. So then I went ahead and cut the shoulder pads into thin strips, so that the blazer hangs more naturally.


Because we're dealing with shoulder pads here, I would be sure to pair the blazer with a pencil skirt or skinny jeans in order to look slim and trim. I might even cinch mine at waist with a neato pin to make the silhouette more dramatic.

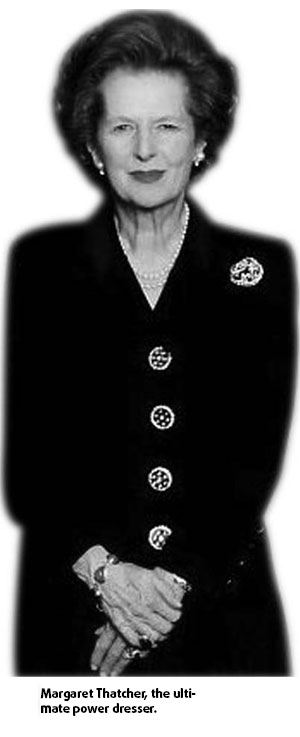
Whether you're trying to channel Michael Jackson or Margaret Thatcher, a great blazer can make a statement.

Song to get you going: Devo - Gut Feeling


10.16.2009

TEXTILE TRIMMINGS

If you happen to have any extra fabric or old t-shirts lying around, don't let them go to waste! Fabric necklaces are a great way to jazz up a look and are super simple to make. They add some nice texture to an outfit without feeling like you're wearing a 200 pound boa constrictor around your neck (like many of my beloved chunky beaded necklaces with which I have a love/hate relationship.)

Here's what you'll need:
- an old t-shirt (I used the sleeves of an old tie-dyed long sleeve tee)
- three long strips of fabric (about a yard long, depending upon how long you want the necklace)
- chain, beads, pearls, ribbon, etc. for accent

TOTAL COST: Free (if using an old t-shirt) - about $2.00 (for chain, metal ring, etc.)

First I'll start with the bib necklace because it's a bit trickier. I cut off the sleeves of an old tie-dyed t-shirt (you can cut off strips from the bottom of a t-shirt) and made 8 strips about equal length (pictured is a white t-shirt for demonstration sake...easier to see.)


Next, you'll make two braided pieces that will go around your neck, so make the braids as long as you want before the bib portion. You may want to tie the braids on a ring or other sort of clasp (as pictured in the tie-dyed version) or you can tie the ends together. When each braid is as long as you want it, tie two of the three pieces in a knot so the braid doesn't come undone.


Tie a piece from each of the two braids together to connect the braids. Tie on the extra two strips of fabric to the connecting piece between the braids.


Now, just keep knotting random strips of fabric to build the bib portion. Make sure you're connecting strips across the whole width of the necklace so that all of the strips of fabric get utilized and the bib sticks together (see progress below.)


Tuck in or cut the ends of fabric, and your finished product should look like this!


Phew! After completing the bib necklace, this next one will be a walk in the park. I used the ends of a piece of fabric that I didn't need and a leftover piece of chain from other projects (see chain gang.)

Cut three thin strips of fabric about a yard in length. Next, cut a piece of chain (beads, ribbon, whatever you like) the same length as the fabric. Tie the three pieces of fabric and accent piece (chain) in a knot and start braiding. To end the necklace I just made one big cluster*beep* knot (keepin' it clean for the kiddos.) You can use a ring like in the tie-dyed necklace if you prefer a different look. I figured that my long locks will cover the knot so I didn't sweat it.

Voila! From scraps to adornments in a matter of minutes.

Song to get you going: Ruby Suns - Kenya Dig It?


10.14.2009

CHAIN GANG

Chains are popping up everywhere and I love it. (check out this posting on stylebubble for some great examples.) I wanted to get in on the fun so I headed straight to the most logical place for fashion goodies...Menards. (No, I'm not kidding.)

A chain belt is a surefire way to up your badass points, and can be adjusted to be worn with jeans, skirts, dresses or even a slip if you're feeling really cheeky. I wanted to up the ante from a belt so I made a chain harness, which makes me feel part Billy Idol and part Knight of the Round Table.

Here's what you'll need:
- large link chain for the base (I got a 10 yard pack from Menards $5.99)
- various desired sizes of chain for decoration (I got two varieties from Hobby Lobby for $1.29/yard)
- belt closure (I used a gadget I found at Menards, a small carabiner would work too)
- needle nosed pliers
- wire cutter (if working with small chain)


TOTAL COST PER PIECE = about $6.00

 For the belt: Hook one end of the large chain in your belt closure of choice, then measure the chain around your waist for the right length and hook the other end through the belt closure. Use the needle nosed pliers to separate the chain link directly after the link in the belt closure and remove excess chain. Then use either needle nosed pliers or wire cutter to make chain strands of various lengths and attach them where desired.


For the harness: Start by putting the chain over one shoulder and determine the right length for the two main pieces (think of the chain pieces as suspenders.) Again, you'll use needle nosed pliers to separate chain where possible, wire cutter where necessary. Next determine how wide you want the harness to be, and create 6 equal length pieces of the large chain: 3 for the front and 3 for the back. When you to go place the horizontal pieces, count the number of links between each piece so that the harness doesn't end up all catywompus. When you have the base done, add additional sizes of chain for a more dramatic look.

Song to get you going: Black Rebel Motorcycle Club - Took Out a Loan


10.11.2009

HEAD CASE

I dig all the crazy hair accessories in stores these days, but I'm not about to drop 35 buckaroos for a peacock feather on a bobby pin. Making your own decorative hair pieces is very easy and inexpensive.

Here's what you'll need:
barrettes or hair clips - I got a pack of 4 for $2.99 at a craft store
glue - I recommend super glue ($1.99) or a super strong craft glue
wire - thickness required depends on what you're putting on the piece (mine was $3.49)
fake flowers - $1.99 for one bunch
feathers - two sets of feathers for $1.99 each
butterflies - $2.49 for a set of 6
beads/pearls - two sets for $1.49 each (I found mine in the wedding decoration section of the craft store)
sequins - 1/2 yard at $2.49 per yard

TOTAL COST = about $4.00 per piece

 Put however many decorative pieces you feel like on the clip (you'll see I went a little overboard with the flower piece, but that's me.) I used a combo of wire and glue when securing things to the clip to ensure that these lovely little pieces will stay intact throughout even the wildest nights on the town (or days at the beach, or days at fashion school for me...that's the real test.)

Decorative hair pieces are an easy  way to jazz up a plain outfit and a painless way (unlike 6 six inch heels) to showcase your fashion know-how.

Song to get you going: Florence and the Machine - Dog Days Are Over